Egg Salad Sandwich

Friday, July 22, 2011

A quick, easy and tasty meal. Egg salad whipped with boiled eggs and mayo spread between two slices of bread to make a sandwich!


Read More...

Do I call it a breakfast sandwich or lunch or a dinner sandwich? Eh Well, it is good to have it at any meal, so why bother!
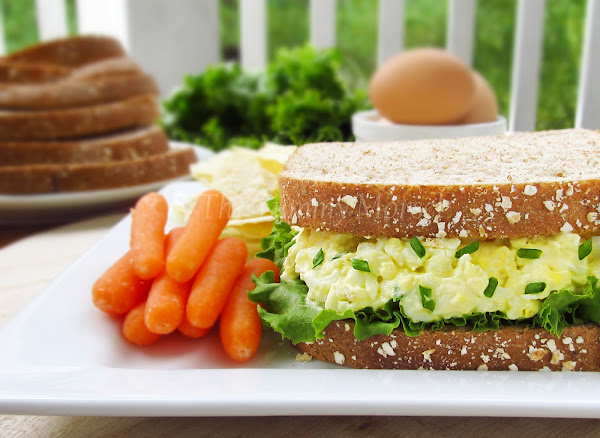


Egg salad sandwich is an easy to make, nutritious and tasty sandwich. Egg salad made with boiled eggs and mayo spread between two slices of bread to make a sandwich! If you are the spicy kind you might find this a little bland, as it has no spice factor.


I usually avoid having these at Café or Deli because they contain high amounts of fat, as the major component of the salad is Mayo. You can make a healthier yet tasty version at home by substituting light mayo and whole grain bread. You can also use just boiled egg whites for the salad but trust me it tastes better with the yolks!.


Look through your pantry for these ingredients to put together a quick sandwich.


Egg Salad Sandwich


Makes: 2 servings

Bread - 4 slices
Eggs - 3 – 4 Eggs
Mayo - 3 - 4 tbsps
Salt - to taste
Pepper - to taste
Chives - 1 tbsp chopped (Optional)
Celery - 1 tbsp finely chopped (Optional)

Boil eggs in water for about 15 minutes. When done, cool it and peel the shell.

Place the peeled eggs in a bowl. Mash the eggs with a fork. Do not make a paste! It has to be little lumpy.

Add mayo, chives, celery, salt and pepper to the mashed eggs and mix well to make the salad. If the egg salad is too thick, you can add a little extra mayo to loosen it up. Taste it to make sure salt and pepper are correct.

A few ingredients you can add to the egg salad for a different flavor are mustard, parsley, bacon or any thing of your choice.

Chill the salad in the refrigerator for about 5 minutes.

Divide the mixture into two portions to make two sandwiches. Spread each portion between two slices of bread and bite!!!!!

Masala Macaroni

Tuesday, July 12, 2011

Masala Macaroni

Pasta does not always have to be paired with cheese sauce or tomato sauce. Our desi masala and spices work great. With this macaroni, your taste buds will experience a completely new flavor for pasta.


Read More...


Pasta does not always have to be paired with cheese sauce or tomato sauce. Our desi masala and spices work great !

Though I love pasta, sometimes I am bored of eating cheesy pasta or pasta marinara. That is when my mom’s macaroni comes handy! At home, back in those days we never had variety of cheeses or pasta sauces available in the market. So my mom would add her desi spin to the dish, be it pasta or pizza!


Masala Macaroni


Macaroni tossed with stir-fried veggies along with medley of masala and spices gives this dish a desi flavor. My special spin on this is cumin with soy sauce! Surprising haaan? Yes! I never thought these two ingredients blend so perfectly on heat to give a smokey masala flavor. I cannot stress enough on this combination; they just take the dish to the next level. With this macaroni, your taste buds will experience a completely new flavor for pasta


Masala Macaroni


Makes: 2 Servings


Elbow Pasta - 2 cup uncooked Ginger Garlic Paste - 1 tsp
Onions - 1 Medium  Cumin Powder - 1 tbsp
Green Bell Pepper - 1/2 cup chopped Turmeric powder - 2 tsps
Red Bell Pepper - 1/2 cup chopped Coriander powder - 1 tbsp
Carrot - 1/2 cup diced Cinnamon - 1/2 inch stick
Green Peas - 1/2 cup Cloves - 3
Tomato sauce/paste - 3 tbsps Cilantro - a handful
Soy Sauce - 1 -2 tbsps Curry Leaves - 4-5
Hot n sweet Maggi
Ketchup
- 2 tbsps Oil - 4 -5 tbsps
Garam Masala - 1 tbsp(optional) Salt - to taste

Cook pasta in boiling water until al dante. Drain the water and set aside.

Heat oil in a pan, add cloves, cinnamon, ginger garlic paste and fry for a minute till it flavors the oil.

Add onions, bell peppers, carrots, green peas and fry till they are cooked but still crisp.

Now, add cumin and soy sauce and fry for a couple of minutes, you will get a smokey masala aroma.

Add pasta to the veggies and combine them together.

Add turmeric powder, coriander powder, garam masala, tomato sauce/paste and tomato ketchup, salt and stir for few minutes till all of the pasta is well coated with the masala and sauce.

Add few curry leaves and some cilantro and give a quick stir to spread the fragrance throughout the dish.

Turn off the stove and serve hot!

Coconut Rice

Wednesday, June 22, 2011

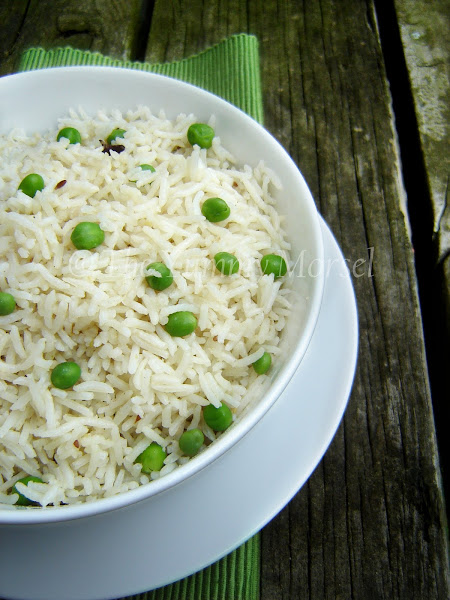
A very rich, aromatic dish made by cooking basmati rice in thick creamy coconut milk along with fragrant spices. The warmth of the spices and the mild sweetness of the coconut perfectly balance out and give the taste that will linger in your mouth.


Read More...

Coconut Rice is a very rich, aromatic dish made by cooking basmati rice in thick creamy coconut milk along with fragrant spices. The warmth of the spices and the mild sweetness of the coconut perfectly balance out and give the taste that will linger in your mouth.


Coconut Rice


Coconut Rice is mild and soothing, with green chilies you can add a touch of spice to it. Also, throw in a handful of green peas to give some color and freshness to the dish.


I think coconut rice is a humble dish! But ‘looks can be deceptive’! It looks very plain and light but a few spoons can fill you up giving a deeply satisfying feeling.


Coconut Rice


Makes: 4 servings

Coconut Milk – 4 cups
Basmati Rice - 2 cups
Onions - 1 medium
Green Peas – 1 cup
Green Chilies - 4-5
Cloves - 5
Cinnamon stick - 2 1” sticks
Bay leaf - 2 small
Cardamom - 2 with pod
Ginger Garlic Paste - 1 Tbsp
Oil - 2 Tbsps
Salt - to taste

Heat oil in a pot. Add cinnamon stick, bay leaf and cardamom, fry for couple of minutes till it flavors the oil

Add ginger garlic paste and fry till the raw smell is gone

Now, add onions and green chilies, fry until onions are soft and translucent

Add green peas and stir for a minute.

Pour in coconut milk, wash rice and add it to the pot. Stir well till everything is combined.

Transfer the liquid to a electric cooker.

If using pressure cooker, do all the above steps in the cooker instead of the pot. Cook until the liquid in the cooker comes to a slight boil, close the lid. Place the pressure cooker weight when steam starts to come out from top. Switch of the stove and remove the cooker from stove after 2-3 whistles.

Set the electric cooker in cook mode.

When done remove the container from electric cooker and serve hot.

Nankhatai

Friday, June 3, 2011

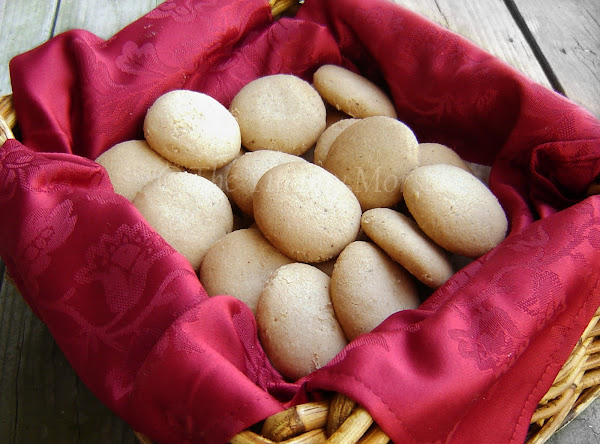
A soft, eggless biscuit made with flour, cardamom, ghee and sugar. Each bite of the warm biscuit will just melt in our mouth.


Read More...

I remember school days, back from school we would climb up the stairs smelling the aroma of warm ghee and cardamom and I would immediately know that it's Nankhatai. My grandmother would bake them just before we arrived from school and we would try to grab it even before it cooled! Each bite of the warm biscuit would just melt in our mouth.


My grandmother was a great cook; her passion for cooking introduced us to many delicious dishes. She is no longer with us but her love and the taste of her delectable food will always stay with us. Love you, Nama!


Nankhatai


I took this recipe from my mom, who got it from my grandmother back then. She did not give me accurate measurements for the ingredients. I tried out couple of variations and now they taste like my Nama’s :-)


Nankhatai is an eggless, soft biscuit made with Maida, Cardamom, Ghee and Sugar. This recipe calls for just a few ingredients and simple procedure. The key ingredient for the taste is ghee


All you need to make these soft yummy biscuits are:


Nankhatai


All Purpose flour/Maida- 1 Cup
Ghee- 1 Cup
Cardamom powder- 1 Tbsp
Powdered Sugar- 1 Cup
Baking soda- 1/3 Tsp

Mix maida, sugar and cardamom powder in a bowl.

I blend 8-9 cardamom seeds with pod removed along with sugar to make cardamon sugar.

Add baking soda to the maida mixture and mix well.

Baking soda is used to give rise (bulged look) to the biscuit when it is baking. Make sure to use fresh baking soda or else the biscuits will not rise.

Now, add ghee to the maida mixture and knead it into dough. Do not add water! You can add more ghee if you need. Cover the dough and keep it aside for 4-5 hours.

Pre-heat the oven to 320 F. Grease a baking sheet and keep it ready.

Divide the dough into small round balls, flatten them in between your palms and arrange them on the baking sheet.

Place the baking sheet in the oven and bake for 12- 15 minutes or until the biscuits have slightly browned.

I would recommend keeping a watch on the biscuits after 10 minutes to make sure you don’t burn them.

When done remove from the oven and set aside to cool.

If the aroma has already made your tongue drooling, hold on the biscuits can be very hot.